Setting Up a Lab: Step-by-Step Guide to Installing Suricata as an Intrusion Detection System on Raspberry Pi to Generate Logs, by Aden Hawsh

Introduction.
This lab guide was methodically developed with the primary purpose of serving as an educational resource for those interested in learning about and setting up a Security Operations Centre (SOC) basic lab. It is aimed at students who want to properly monitor their small office or home networks(for project or practice) while maintaining security and integrity. The growing incidence of cybersecurity risks needs a solid understanding of how to safeguard network infrastructures against potential attacks and unauthorised access. This lab aims to provide readers with the information and skills necessary to install and deploy Suricata, an open-source Intrusion Detection System (IDS), on a Radxa Raspberry Pi. This guide serves as a comprehensive instructional, bringing readers through each crucial stage of the process, from the initial configuration to the final implementation and testing phases
IDS (Suricata) on Radxa Raspberry Pi
Figure 1 demonstrates how to configure an intrusion detection system using Suricata installed on a Raspberry Pi to monitor the network using a Switch ZYXEL to mirror some ports and monitor the Raspberry Pi-connected port.
Figure1 Network setup for Suricata to monitor the network.

Installing Suricata on Rock-4c-plus(Raspberry Pi
Step 1. This step is to connect my raspberry pi(radxa) through ssh from my Kali machine as shown in Figure 2.

Figure 2 Connecting through ssh from Kali machine to Raspberry Pi
Suricata will be installed using the install command after successfully connecting to the Raspberry Pi, as seen in Figure 3.
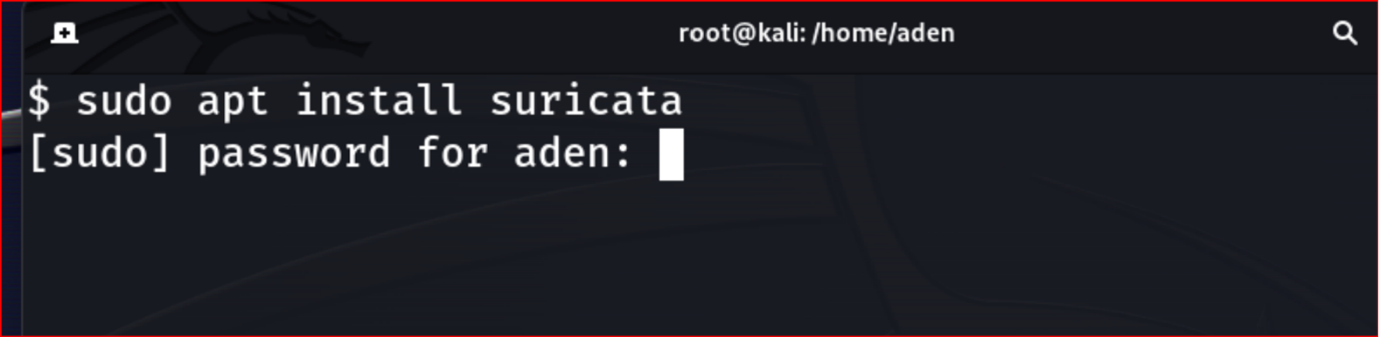
Figure 3. Installing Suricata on the Raspberry Pi machine.
Step 2. In this stage, I'll use the (ip a) command to check the IP address and interface, which is eth0 on my Raspberry Pi, as shown in Figure 4.

Figure 4. Checking the Interface of Suricata connected monitor port
Step 3. Once we have identified the port and IP address, it is time to edit the suricate.yaml file which is the configuration file of Suricata that will update the interface and Ip address.

Figure 5 Editing Suricata configuration file yaml file.
After using vi or nano to edit the yaml configuration file will go address group and unhash the HOME_NET then edit the IP address as per our home network IP address as shown in Figure 6

After editing will update Suricata and the change will take effect, but first will checklist source for our rules as shown in Figure 64

Step 4. In this step we will install the Emerging Threats open ruleset which is free as the arrow highlighted in Figure 8, There are tons of rules to download and some of them are free to use.

As Figure 9 shows, we will use this command to install the Emerging Threats open Ruleset from Proofpoint with name et/open

Figure 9 Installing command et /open rule
It will take a while to install all rule sets and will give a list of updates as shown in Figure 10

Figure 10. Installing the process of the rule sets
Step 5. In this step, we will update the Suricata repository for the installed set of rules to take effect. We will employ the update command as depicted in Figure 11.

Figure 11 updating Suricata.
Step 6. After completing the preceding steps, it is time to enable suricata and begin using the command in Figure 12.

Figure 12 depicts the status command we will use to determine the status of Suricata after installation and configuration of all required steps to execute. As the figure13 highlighted in green colour that status is active and running in our raspberry pi computer connected to our network

Figure 13.Checking the status of Suricata in the raspberry pi
Figure 14 depicts Remember that doing so will cause Suricata to run in the foreground, printing alarms and other notifications to the console. In a production setting, Suricata is typically configured to run as a system service and log its alerts to a log file.

Figure 14 Testing Interface eth0 and the rule set of Suricata
Setting up Switch port mirroring on the Swtich
Step 7. Setting up Switch port mirroring.
The IDS must be able to analyse frames originating from all network devices.
To accomplish this, we will connect our in and out cables to our ZYXEL switch that employs the port mirroring feature to transmit all frames received from the "mirrored port" to the "analysis port." The Raspberry Pi with Suricata IDS installed is connected to this analysis port.
ZYXEL switch IP is 192.168.1.3 when I click I got the following Figure 15 asking for my login detail to access the interface.

Figure 15 Login detail of the ZYXEL 5 port switch.


Figure 16 Setting up ZYXEL switch port mirroring
As shown in Figure 74, both our ISP's BT router and NETGEAR wi-fi router are linked to ports 1 and 2, which are mirrored, while our Raspberry Pi is connected to port 3, which is set to monitor mode.
Thus, all incoming and outgoing traffic from ports 1 to 2 of the switch will be replicated (mirrored) on port 3 and analysed by our Suricata IDS on the Raspberry Pi on a "mirrored port”.
Step 7 Testing Suricata and network
After completing all of the essential procedures, from installing Suricata to configuring and then configuring port mirroring in the ZYZEL switch, it is time to test it and look at the results in our log file.
I'll test Nmap on my Kali machine by scanning the Nmap website and viewing the log file it generates as an alert.

Figure 17. Testing Suricata and the network map(map)
Finally, we will examine the Suricata log file to determine if Nmap generated any alerts. On my Raspberry Pi (Radxa), where Suricata is installed, perform the following command (sudo tail /var/log/Suricata/fast.log). Figure 18 depicts the log file result and it indeed generated an alert.

Figure 18.Figure Log file alert after login the log file
Conclusion
In summary, this step-by-step lab successfully demonstrated how to set up and configure an Intrusion Detection System (IDS) on a Radxa Raspberry Pi. We were able to monitor network traffic by carefully following the steps, from the first SSH connection to the last testing phase with Nmap. We were able to accomplish this by strategically using a ZYXEL switch for port mirroring, which allowed us to analyse data frames across the network. The process included installing Suricata, setting its settings to match our network environment, updating its rule set with Emerging Threats open rules, and making sure it was active. The lab's success was evidenced by the production of an alert in the Suricata log file, which confirmed the IDS's operational effectiveness.
Aden Hawsh


Comments
Post a Comment